
Intraoral Camera USB Dental Camera
4.0Editor score
Affordable price point
Slim 6mm lens tip
Dual capture buttons included
Dental cameras have revolutionized how professionals and patients visualize oral health. These compact devices capture high-resolution images of teeth and gums, making diagnostics more accurate and treatment plans easier to understand for everyone involved in the process.
We evaluated ten leading models based on image quality, software compatibility, ease of use, and build durability. Our selection includes wired and wireless options designed for clinics, educators, and home users seeking reliable intraoral imaging solutions.
Each pick highlights key strengths and potential limitations to help you make an informed decision. Prices and availability fluctuate frequently, so please verify current details on the product pages before finalizing your purchase decision.
4.0Editor score

4.5Editor score

4.0Editor score
As an Amazon Associate we earn from qualifying purchases.
The following table provides a side-by-side overview of key specifications for all ten selected dental cameras, helping you quickly identify which model meets your specific clinical or personal imaging needs.
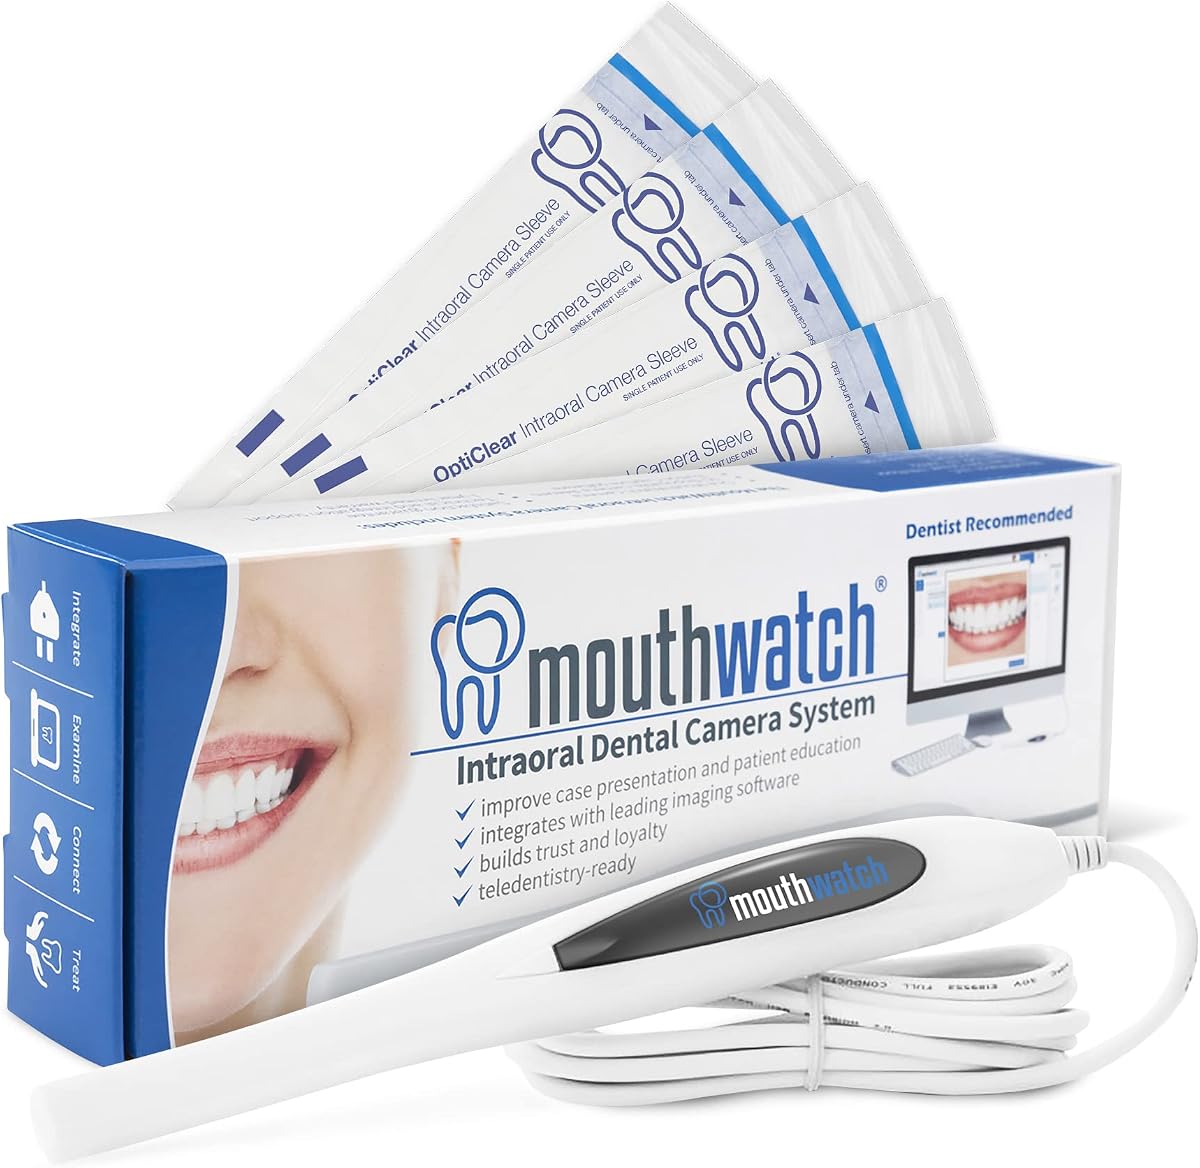


The DY-50 Intraoral Camera stands out as a top choice for dental practices seeking reliable image quality and ease of use. With a rating of 4.5 stars, it delivers crystal clear pictures that enhance patient communication and treatment acceptance. The camera is designed to work seamlessly with a vast array of North American imaging software, making it a versatile option for many clinics.
We may earn a commission when you buy through this link, at no additional cost to you.
Its ergonomic design allows for easy capture of images from both upper and lower teeth, while the included capture button driver ensures that the camera integrates smoothly with software like Eaglesoft and Dexis. The anti-fog, non-spherical lens ensures that images remain clear even in moist environments, which is crucial for accurate diagnostics. Additionally, the automatic power-off function helps conserve energy during periods of inactivity.
One potential trade-off is that the camera is optimized for a specific list of imaging software. If your practice uses software not on this list, you may need to rely on the camera's proprietary software, which could limit workflow integration. However, for most standard setups, the included driver and software compatibility make it a robust choice. The 2-meter cable provides decent reach, though some users might prefer wireless options for maximum flexibility.
Overall, the DY-50 is ideal for professionals who prioritize image clarity and software integration without breaking the budget. It is particularly well-suited for clinics using popular imaging platforms like Dentrix or Carestream. By choosing this camera, you invest in a tool that streamlines documentation and enhances patient trust through visual clarity.
Clear images help patients visualize treatment needs, increasing case acceptance and trust in the proposed care plan.
The included driver ensures the capture button works directly within your existing software, reducing clicks and saving time.
We may earn a commission when you buy through this link, at no additional cost to you.
This Intraoral Camera is designed for professionals who value speed and simplicity in their daily workflow. With a 4.4-star rating, it promises crystal clear images that help patients see the need for treatment, ultimately improving case acceptance. The single-button operation eliminates the need for a mouse or keyboard, saving valuable time during patient interactions.
We may earn a commission when you buy through this link, at no additional cost to you.
The camera features a fixed focal distance between 4mm and 45mm, which removes the frustration of auto-focus hunting. This ensures that images are sharp and focused immediately upon capture. Additionally, the proprietary capture software supports over 50 major imaging solutions, making integration straightforward. The lightweight 31-gram design reduces hand fatigue during long clinical sessions.
While the fixed focal distance is efficient for most dental exams, it may limit flexibility for macro photography that requires precise depth adjustments. However, the trade-off is acceptable for routine diagnostics where speed is key. The inclusion of lifetime customer support adds significant value, ensuring that any integration issues are resolved quickly by a responsive team.
This camera is best suited for busy practices that need reliable, fast imaging without technical hurdles. It is an excellent choice for dentists who want to enhance patient education through clear visuals. The combination of ease of use and strong software support makes it a top contender in the market.
Single-button capture allows you to focus on the patient rather than technical adjustments during the exam.
Complimentary lifetime support ensures you have help whenever you encounter setup or integration challenges.
We may earn a commission when you buy through this link, at no additional cost to you.
The DARYOU DY-60 Camera is a strong option for professionals who need zoom functionality to capture detailed dental structures. With a 4.3-star rating, it offers 720P HD imaging and a 4X zoom feature that allows for closer inspection of teeth and gums. This can be particularly useful for identifying fine cracks or decay that might be missed with standard imaging.
We may earn a commission when you buy through this link, at no additional cost to you.
The camera integrates seamlessly with popular software like Dexis and Eaglesoft through an included capture button driver. This ensures that workflow remains uninterrupted during exams. The USB connectivity provides a stable data transfer, and the absence of a foot pedal requirement simplifies the setup process for most clinics.
However, the 720P resolution is lower than some newer models that offer 1080P or higher. While sufficient for most tasks, it may not provide the same level of detail as higher-resolution sensors. Additionally, the wired connection limits mobility compared to wireless options, which could be a drawback for mobile practitioners.
This camera is best for clinics that prioritize zoom capability and software compatibility over ultra-high resolution. It is a practical choice for general dental practices looking to enhance their diagnostic tools without significant investment. The included driver and straightforward integration make it a user-friendly option.
The 4X zoom allows for closer examination of hard-to-see areas, improving diagnostic accuracy.
No need for a foot pedal means you can focus on the camera and patient without extra hardware.
We may earn a commission when you buy through this link, at no additional cost to you.
The Wireless Auto-Focus Camera offers a modern approach to intraoral imaging with true wireless freedom. Although the rating is 4.0, its features like wireless transmission and smart autofocus make it a standout for tech-savvy clinics. The ability to place the camera on a wireless charging base ensures it is always ready for the next patient.
We may earn a commission when you buy through this link, at no additional cost to you.
Its 13MP HD sensor produces crisp, detailed images, while the 8 integrated LED beads provide uniform illumination to eliminate dark corners. The anti-fog and dustproof structure ensures reliability in moist environments. The WiFi connection is designed to be stable, reducing freezing or lag during critical exams.
One challenge with wireless technology is the need for regular charging and potential signal interference in dense clinical environments. However, the convenience of untethered operation often outweighs these concerns. The USB receiver included ensures easy connection to computers, maintaining compatibility with most dental management software.
This camera is ideal for practices that value mobility and modern convenience. It is particularly well-suited for mobile dental units or clinics aiming to streamline their setup. By choosing a wireless option, you invest in a tool that enhances flexibility and patient comfort during examinations.
Wireless technology allows you to move freely around the patient without cable constraints.
The included charging base keeps the device ready for use, reducing downtime between patients.
We may earn a commission when you buy through this link, at no additional cost to you.
The ProDENT HD Intraoral Camera is designed for broad compatibility across Windows systems and popular dental software. With a 4.0-star rating, it offers reliable performance for general documentation needs. The inclusion of a capture button app helps ensure seamless integration with platforms like Eaglesoft and Dexis.
We may earn a commission when you buy through this link, at no additional cost to you.
Its auto-off feature when placed in the holder helps conserve energy and prolong the device's lifespan. The quick connect/disconnect connector via USB 2.0 makes it easy to use across different stations. Support is provided through email and phone, ensuring you have assistance if integration issues arise.
The main trade-off is that while compatibility is broad, some users report needing manual adjustments for specific software versions. This requires a bit of technical patience during setup. However, once configured, the camera delivers consistent images for routine dental documentation.
This camera is best for clinics using a mix of software platforms that need a flexible, cost-effective solution. It is particularly useful for practices looking to upgrade their imaging without investing in high-end proprietary systems. The strong support network adds value for technical users.
Supports both 32-bit and 64-bit Windows systems, ensuring wide accessibility for various setups.
The auto-off function extends battery or device life by powering down when not actively in use.
We may earn a commission when you buy through this link, at no additional cost to you.
The Intraoral Camera USB Dental offers excellent value for those seeking a compact and affordable imaging solution. Rated 4.0, it features a slim 6mm mini lens that easily reaches back molars and interdental gaps. This makes it suitable for daily check-ups and personal oral health monitoring.
We may earn a commission when you buy through this link, at no additional cost to you.
It includes dual capture buttons for flexible one-click photo capture, enhancing efficiency during exams. The plug-and-play USB 2.0 design means you do not need extra drivers, allowing for immediate connection to computers. The magnetic holder auto-turns off lights to extend the service life.
The trade-off for the budget-friendly price is the lack of advanced autofocus features found in premium models. Images are clear but rely on manual positioning for sharpness. However, for basic documentation, this is a reasonable compromise. The versatility makes it a great tool for both clinics and home users.
This camera is best suited for students, educators, or small clinics on a tight budget. It provides a reliable entry point into digital dental imaging without unnecessary complexity. The ease of use and low cost make it an attractive option for basic needs.
The slim 6mm lens reaches tight spaces like interdental gaps, improving visibility during exams.
Plug-and-play functionality eliminates driver installation, saving time during initial configuration.
We may earn a commission when you buy through this link, at no additional cost to you.
This 13MP USB Dental Camera delivers sharp images with a 1/4" CMOS sensor. With a 4.0 rating, it focuses on high-resolution imaging for accurate documentation. The six high-brightness white light LEDs ensure optimal visibility during oral structure inspections.
We may earn a commission when you buy through this link, at no additional cost to you.
Powered directly by the USB port, it eliminates the need for external power sources. This makes it ideal for mobile dental setups or clinics with limited outlet access. The magnetic holder automatically turns off the LED lights when the camera is hung, saving energy.
The trade-off is that while the resolution is high, the fixed focus range of 10-40mm limits flexibility for close-up macro work. However, for general exams, it provides consistent clarity. The dual-button design allows for flexible operation from either hand.
This camera is best for clinics needing high-resolution documentation without complex power requirements. It is well-suited for educators and students who need clear images for learning. The simplicity and reliability make it a practical choice for basic digital imaging.
USB power means no extra cables or batteries are needed for operation, simplifying setup.
The magnetic holder auto-turns off lights when not in use, conserving power and extending lifespan.
We may earn a commission when you buy through this link, at no additional cost to you.
This Intraoral Camera is designed for diagnostic efficiency with built-in software capabilities. With a 4.4-star rating, it offers zero-latency capture for crisp views of oral concerns. The built-in diagnostic software can analyze captured images to mark conditions and generate reports.
We may earn a commission when you buy through this link, at no additional cost to you.
The 5mm ultra-thin probe allows for comfortable insertion without a wide mouth opening. Anti-shake technology ensures stable images, while the fixed focus range cuts out auto-focus delays. The simple included tutorials help users complete device connection quickly.
The trade-off is that the diagnostic software may vary by version and require additional training. Additionally, it is priced higher than basic models. However, the ability to generate reports adds clinical value. The customer care support ensures any issues are resolved promptly.
This camera is best for clinics prioritizing diagnostic accuracy and patient communication. It is an ideal choice for practices that want to streamline their reporting process. The combination of sharp imaging and diagnostic tools makes it a powerful asset for patient care.
Built-in software can analyze images to mark conditions, improving the accuracy of assessment.
Zero latency capture allows for real-time demonstration of issues, enhancing patient understanding.
We may earn a commission when you buy through this link, at no additional cost to you.
The 13MP Intraoral Camera features an upgraded 4.8mm ultra-thin probe designed for patient comfort. With a 4.0 rating, it captures clear images and real-time video of teeth and gums. The design allows for insertion with a slight mouth opening, suitable for different populations.
We may earn a commission when you buy through this link, at no additional cost to you.
It includes front and back dual capture buttons to support flexible left and right hand operation. The eight high-brightness LEDs ensure optimal illumination in low-light conditions. The USB controller cable connects directly to a computer without complex settings.
While the comfort feature is excellent for anxious patients, the camera lacks the advanced diagnostic features of premium models. However, for routine exams, it delivers reliable images. The magnetic holder auto-turns off lights to save energy and extend service life.
This camera is best for clinics focusing on patient comfort and ease of use. It is well-suited for pediatrics or practices with many sensitive patients. The combination of comfort and reliable imaging makes it a practical choice for daily exams.
The ultra-thin 4.8mm probe allows for insertion with a slight mouth opening, maximizing comfort.
Front and back buttons support left and right hand use, enhancing workflow flexibility.
We may earn a commission when you buy through this link, at no additional cost to you.
The 1920P HD Oral Endoscope is a versatile tool designed for personal oral health monitoring. With a 4.0 rating, it offers a high-resolution magnified view of internal surfaces. The universal 3-in-1 connector ensures stable plug-and-play experience with Android devices and computers.
We may earn a commission when you buy through this link, at no additional cost to you.
It features six adjustable high-intensity LED lights to ensure every corner is well-lit. The IP67 water-resistant rating allows for safe rinsing after each use. This durability focuses on material integrity and long-term mechanical performance.
The trade-off is that it is not compatible with iPhones, limiting its use for iOS users. Additionally, it lacks the advanced software integration found in clinical models. However, for home users seeking to inspect hard-to-reach areas, it is an excellent option.
This camera is best for individuals who want to track their oral hygiene at home. It provides clear real-time observation on smartphones, making it easy to identify areas needing attention. The durable design ensures it can withstand daily use.
High-resolution magnified view allows users to identify areas requiring closer attention daily.
IP67 water-resistant rating ensures safe rinsing after use, maintaining hygiene standards.
We may earn a commission when you buy through this link, at no additional cost to you.
Selecting the right dental camera depends on your specific needs, whether for clinical use or personal monitoring. This guide outlines key factors to help you make an informed decision.
Resolution determines the clarity of your images, which is crucial for accurate diagnostics. Higher resolution sensors like 13MP or 1600×1200 provide sharp details of teeth and gums, helping identify cracks or decay that lower resolution might miss. Look for cameras with high-quality CMOS sensors and anti-fog coatings to maintain clarity in moist environments. Clear images also improve patient communication by making conditions easy to understand.
For professional use, aim for at least 1080P or 13MP sensors. Home users may find 720P or 1920P sufficient for visual inspection. Always check reviews for image quality consistency to ensure reliable results.
Integration with your existing dental software is essential for efficient workflows. Check if the camera supports platforms like Eaglesoft, Dexis, or Carestream through built-in drivers. Some models include capture button drivers to enable one-click image saving directly into patient charts. Proprietary software can be helpful but may limit interoperability with other systems. Always verify compatibility with your practice's current setup before purchasing.
Prioritize cameras that offer broad software support or dedicated drivers. This reduces setup time and ensures that captured images are immediately available for patient records.
Wired cameras connect via USB ports and require no extra power sources, making them simple and stable. Wireless models offer greater mobility but depend on charging bases and stable WiFi connections. For clinics with many devices, USB connectivity ensures consistent performance. Mobile practitioners might prefer wireless options for flexibility. Consider your workspace setup when choosing between wired and wireless solutions.
USB 2.0 connections are standard for plug-and-play functionality. Wireless cameras should include stable transmission technology to avoid lag during exams. Always verify power requirements to ensure compatibility with your computer or mobile devices.
A comfortable probe design reduces hand fatigue during long clinical sessions. Look for lightweight handhelds and slim lens tips that easily reach back molars and interdental gaps. Ultra-thin probes like 4.8mm or 6mm are ideal for patients with limited mouth opening. Ergonomic buttons allow for flexible operation from either hand. Comfort directly impacts workflow efficiency and patient experience.
Select cameras with balanced weight and intuitive button placement. Slim probes enhance accessibility without compromising image quality. Prioritize designs that allow for natural hand movement during exams.
Proper lighting is key to capturing clear images inside the mouth. Cameras with 6 to 8 LED beads provide uniform illumination without dark corners. Anti-fog and dustproof coatings ensure the lens remains clear in moist environments. Fixed focus distances eliminate auto-focus hunting, while adjustable LEDs let you control brightness for different conditions.
Prioritize models with multiple LED lights and anti-fog lenses. These features ensure that images remain sharp and well-lit regardless of the environment. Consistent lighting improves diagnostic accuracy.
Dental cameras are used frequently and must withstand regular cleaning and handling. IP67 water-resistant ratings indicate durability and ease of cleaning. Magnetic holders that auto-turn off lights extend the lifespan of LED components. Check the warranty and support terms before purchasing to ensure long-term reliability. Lifespan is crucial for clinics using the device daily.
Look for cameras with robust construction and protective coatings. A strong warranty adds peace of mind for expensive purchases. Regular maintenance and proper storage further extend the device's life.
Advanced cameras include built-in diagnostic software that can analyze images for conditions and generate reports. These features improve assessment accuracy and streamline documentation. Other useful tools include digital zoom capabilities and video recording options for real-time observation. Not all models offer these features, so prioritize based on your clinical needs. Higher-end models may justify the cost with added functionality.
Consider whether you need diagnostic software or just basic imaging. For general use, a standard camera is sufficient. For complex cases, advanced analytics can support better treatment planning.
Dental cameras range from affordable budget options to premium clinical models. Determine your budget while considering the features needed for your workflow. Budget cameras are suitable for students or home use, while premium models offer better integration and resolution. Value is defined by how well the camera fits your specific requirements. Always compare long-term value rather than just upfront cost.
Invest in a model that balances cost with essential features. Overpaying for unnecessary functions or underpaying for critical integration can both lead to dissatisfaction. Focus on models that offer the best combination of performance and reliability for your needs.
Before using the camera, ensure it is securely connected to your computer via USB or paired via WiFi if wireless. Install any required drivers or capture software provided with the device. Check that the camera is powered on and the LED lights are functioning properly before starting your exam. A stable connection ensures that images are saved correctly to your patient records.
During the examination, hold the camera gently to avoid slipping, especially in moist environments. Position the lens close to the tooth or area you want to document, keeping a slight distance for optimal focus. Use the capture button on the camera to take the image directly into your software. Repeat this process for all areas needing documentation. Ensure that the probe is comfortable for the patient to avoid discomfort.
After use, rinse the camera head with water or a recommended cleaning solution to maintain hygiene. Place it in the magnetic holder to turn off the LED lights and allow it to cool. If the camera has an anti-fog lens, wipe it gently with a soft cloth to remove moisture. Store the device in a dry place to prevent dust buildup. Regular maintenance ensures longevity and consistent performance for future exams.
A dental camera is used to capture high-resolution images of teeth and gums for diagnostic and educational purposes. It helps dentists identify issues like cracks or decay, document oral health status, and show patients visual evidence of treatment needs. This enhances patient communication and facilitates better clinical records. Home models also allow individuals to monitor their oral hygiene independently.
Most dental cameras come with a capture button driver or proprietary software that enables integration with major platforms like Eaglesoft or Dexis. Install the drivers on your computer, connect the camera via USB, and configure the capture button within your software settings. Always check the compatibility list provided by the manufacturer to ensure seamless workflow without extra configuration steps.
Wireless cameras offer greater mobility and reduce cable clutter, making them ideal for mobile practices or clinics with multiple workstations. However, they require regular charging and stable WiFi connections to function properly. Wired cameras are generally more reliable and easier to set up. Choose based on your need for flexibility versus consistent performance.
Some dental cameras, particularly endoscopes, are designed to connect to smartphones via USB or OTG adapters. Ensure your phone supports OTG functionality and that the camera has the right connector type. Not all professional dental cameras support mobile use, so verify compatibility before purchasing if you plan to use it with a phone.
Clean the camera head with water or a mild disinfectant after each use to maintain hygiene. Use a soft cloth to wipe the lens and avoid abrasive materials that could damage the coating. If the device is water-resistant, you can rinse the probe directly. Store it in a dry place to prevent moisture damage and ensure longevity.
For clinical use, a resolution of 1080P or 13MP is recommended to capture detailed images that support accurate diagnosis. Higher resolution allows for clearer visualization of cracks and textures. Home users may find 720P sufficient for basic inspections. Always balance resolution with image processing capabilities to ensure smooth performance.
Most professional dental cameras are designed to work with existing dental management software like Dentrix or Carestream. They typically include drivers that allow images to be saved directly to patient charts. Some cameras come with proprietary software for viewing, but this can limit interoperability. Always check compatibility with your current system.
With proper care and maintenance, a dental camera can last several years even with daily use. Durability depends on factors like build quality, frequency of cleaning, and storage conditions. Regularly cleaning the lens and storing the camera in a dry place extends its life. Warranty terms also vary by manufacturer and can provide guidance on expected durability.
Selecting the right dental camera involves balancing image quality, software compatibility, and ease of use. The DY-50 stands out for overall value and integration, while the wireless models offer mobility for modern clinics. Budget options provide reliable basics for those just starting out.
When choosing, prioritize factors like resolution, connectivity, and ergonomics to match your clinical needs. Investing in a camera with strong software support saves time and ensures efficient workflows. Consider the specific features that will most benefit your daily practice.
Remember that prices and availability can change frequently, so check the current product pages for the latest details. Always verify compatibility with your existing systems before making a final purchase. By following this guide, you can select a tool that enhances both your diagnostic capabilities and patient care.